Making screencasts for teaching mathematics
This material was produced as part of a HEA MSOR-funded project, ''Supporting students studying advanced calculus using screencasts'' to produce and evaluate the effectiveness of mathematical screencasts.
Project team: Camilla Jordan, Tim Lowe, and Ben Mestel from the Open University (UK), and Birgit Loch from Swinburne University of Technology (Australia).
We would very much appreciate feedback on this document and will make updates and improvements as the project progresses. Feedback should be sent to C.R.Jordan@open.ac.uk
Introduction
This web page is a brief guide as to how to make screencasts that can be viewed either on the internet or on a mobile device. The software used is assumed to be Camtasia Studio 7. However much of the principles described will be relevant for other software.
We are assuming that the screencasts are intended to be produced fairly quickly and without using professional studio equipment.
Initial comments
A screencast is a recording of any screen movement including speaker audio, for example to walk you through the handwritten solution of a mathematical problem.
You need to decide on any applications that you intend to use and become familiar with their use. You might like to use some form of tablet for writing on the computer. While (typed) animations can be very effective, this makes it possible for students to see mathematics written out as it is being done rather than presented with pre-prepared slides. It is a good idea if any application you use has inking facilities. Some ink-enabled applications to consider using are:
- PDF Annotator - if you wish to pre-prepare some material using LaTeX;
- Word - if you wish to pre-prepare some material using MS Office Word;
- Windows Journal, MS Office One Note or other inking software if you are not using pre-prepared material or if you want to annotate material that cannot easily be written on from within its application (in this case, you can print to OneNote);
- PowerPoint - if you wish to pre-prepare some material using PowerPoint.
You may like to make sure that the application you use is set up so that the page can scroll easily. For example in PDF Annotator have the view properties set to Single page continuous.
We suggest that the size of the recorded area should be 480 x 320 pixels as this seems to work well with most mobile devices. Using a relatively small area keeps the file size down. You should, therefore, record in a window either of this size or with these proportions (3:2) as this will prevent distortion.
Experiment has shown that any pre-prepared material needs to be done in a reasonably large font size - 16pt appears to be fine. It is worth doing a quick test with this and to check the results on a mobile device.
Use a good quality microphone or headset. The quality of this can make a significant difference to the result.
Procedure for Windows XP (Windows 7)
- Set up your hardware - tablet, microphone or headset.
- Prepare the application that you are going to use. Make sure that the window size is appropriate and scrolls easily. Make sure the window is positioned well on your desktop
- Ensure a quiet location - no phones liable to ring, nobody else in the room.
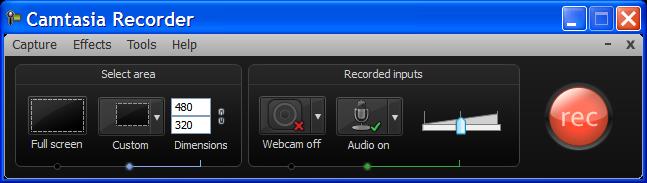
- Start either Camtasia Recorder or Camtasia studio (the overarching software). If the latter; in the Welcome window that overlays the main window, select 'Record the screen'. If the 'Welcome' window has been disabled, select 'Record the screen' from the row of options below the main menu bar. This brings up the Camtasia recorder and dims the computer display except for the region which is to be recorded.
- [First time only - unless you have changed the settings and need to reset this.] Set the recording properties.
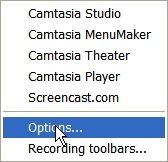
- From the Tools menu, select Options, then the Inputs tab on the window that pops up.
- Set the 'Screen capture frame rate' to 10.
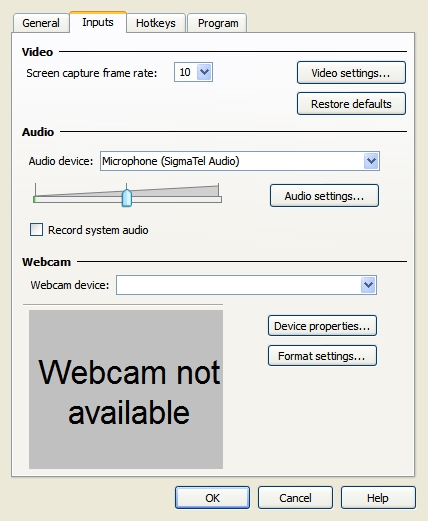
- Click on the 'Audio settings' button and select the following settings:
- Format: MPEG Layer-3 (TechSmith LAME)
- Attributes: 44100 Hz, 64 kbps Mono 7 kb/sec
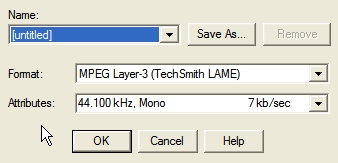
- Click OK.
- Click OK to close the Tools Options menu.
- In the 'Recorder window' check that the Webcam is off (the icon has a red cross). If it is on, click the main part of the icon to turn if off.
- In the Recorder panel, make sure the microphone is on (the icon has a green tick). Click the arrow next to the microphone icon and check that the correct microphone is selected. (If using a USB headset, this will be listed as a 'USB headset')
- Speak into the microphone at the level you intend to speak when recording and check the sound levels are satisfactory. Adjust the volume slider in the recorder panel so that the maximum sound levels consistently get into the yellow region, and rarely into the red.
If it is not possible to get the sound levels loud enough, the Windows system sound level might have to be increased:
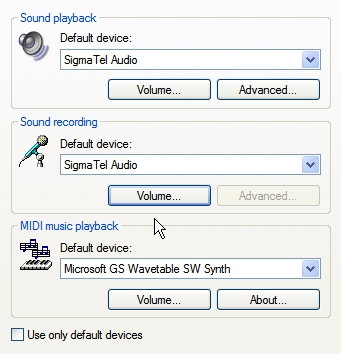
- Right click the speaker icon in the icon tray next to the clock at the bottom of the windows desktop, and select Adjust Audio Properties (Recording Devices) - Select the Audio tab (Recording tab)
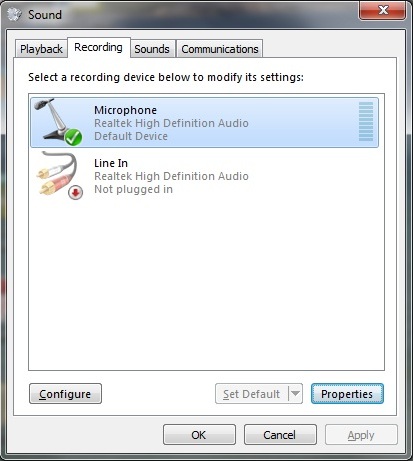
- Under Sound recording, ensure the correct microphone device is selected in the drop down list (check that your microphone is selected).
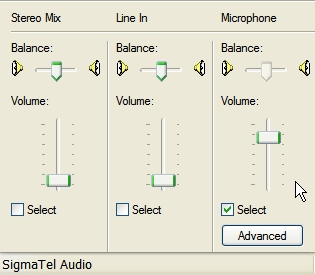
- Click Volume (under Recording - double-click on your microphone)
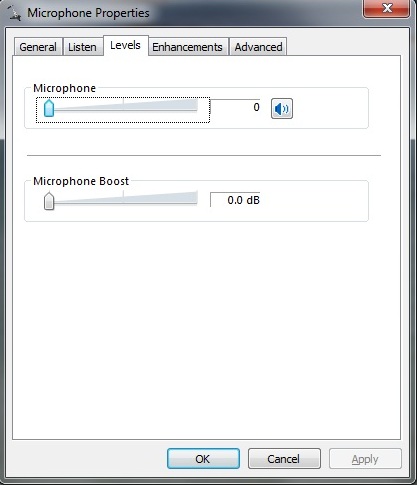
- This brings up the system microphone input level. Select the levels tab and increase the microphone levels until you can use Camtasia and get decent audio levels.
Windows XP
Windows 7
- To avoid mouse click sounds being included in the recording, ensure that the item 'use mouse click sounds' in the Effects menu is unchecked.
Select the region of the screen to be recorded. This can be done by either dragging the small squares at the corners of the boundary of the highlighted region of the screen, or typing pixel sizes into the numerical entry boxes on the Camtaisa Recorder. The size choosen should be an integer multiple of 480x320 (ie, 480x320, 960x640).
It is probably easier to make a recording if the largest integer multiple of this resolution that fits on the screen is used. It is also possible to move the recording area by clicking on the icon right in the centre of the grey shaded recording area.
Adjust the size of the application to be recorded and the position of the recording area to appropriately match. (ie, the page size of the application exactly matches the recording area. The recording area might need to be moved to avoid toolbars etc).
-
When you are ready to start, take a deep breath and press the big record 'rec' button. (Or press F9). Then move the mouse pointer away from anywhere it might obstruct!
When the count down ends, start your presentation.
-
At the end, press F10 to finish. You might like to complete a couple of practice recordings to ensure everything is set up properly.
By the way, to pause a recording, click on the Camtasia icon from the task bar. Then press the pause button. Press it again to resume.
Editing your recording
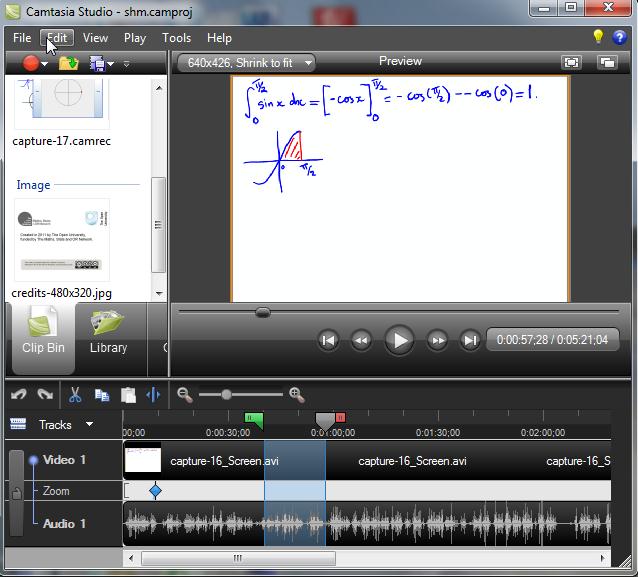
A 'Preview' window opens, showing your recording. Watch it if you wish to check its all OK at this stage. Click 'Save and Edit' in the bottom right-hand corner of the 'Preview' window to save your raw recording and move to the editing stage. It will ask where you want this raw recording to be saved. You are then taken back to the Camtasia studio window to edit/produce your screencast. A pop-up window asks what size you want the final recording to be - select 480x320. You can edit out any mistakes you have made here.
At any time, click on the Zoom In button to zoom into the time line.
Click on Zoom Out or a section of the control bar between the two buttons to adjust.
By default, Camtasia sometimes automatically zooms the screencast to focus on the region of interest - in most cases we don't want these. The zooming can be deleted by right-clicking on the "zoom" line within the timeline at the bottom of the screen and selecting "Remove all zoom keyframes".
There are various ways to edit your recording. You may decide to skip this section if you've got experience with video or audio editing software.
The easiest form of editing is to trim the beginning and end of a recording, or remove a section in the middle.
- Trimming the beginning: Play back the video until the playhead is a point where you would like your recording to start. Press the split button. This will result in two sections. Select the first, and press the delete key on your keyboard.
- To trim the end, split the recording just after you would like the recording to finish. Then remove the last section.
- To remove a section in the middle of the recording, split just before this section and just after. Select the section and delete it.
Many more editing features are available, for instance call outs, transitions, Zoom and Pan. The Techsmith site provides a number of introduction videos on how to use Camtasia Studio:
http://www.techsmith.com/learn/camtasia/7/
You can now add any standard 'credits' slide to the end of the screencast.

- In the Camtasia Studio window, click on the Import media icon at the top, or select this item from the File menu.
- Browse to find the image you require and add it to the project.
- Move the playhead to the end of the timeline.
- Right click on the imported image and choose 'Add to timeline'.
- Note that it seems that .png files are not compatible. Image files in .jpg format are fine.
When all editing has finished, save the edited Camtasia file using 'File-Save project'.
It is important to save this project file if you want to go back and make more edits. If you don't save this file, only the raw recording (minus your edits) will be kept.
Click 'Produce and share' in the row of choices along the top row of the screen.
From the drop down menu, in the 'Production Wizard' select 'iPhone'
When asked, give a name for your final output, and choose a folder for this to be stored.
Click 'Finish'
Wait When it has finished, click 'Finish' to close the window.
You can now close down Camtasia studio. Don't forget!!!. Once the video production is finished, you still have the application you wrote on open. You can save your annotations and so make the final document available to students.
If you are using software that does not have a 'save as pdf' function, but would like to produce a PDF document, you can use a 'free' PDF printer driver such as PrimoPDF (www.primopdf.com). After installing this, it appears as a 'printer' in your list of possible printers. Printing to this 'printer' generates a PDF file. You will be asked where you want it saved. Decide on some keywords to classify the screencast.